Knative
Using Knative, we will send data towards the Timescale database. Coming from an IoT world, protocols like MQTT and HTTP are much more common than "SQL". So we need to translate the data coming from our devices into SQL statements, and execute them against the Timescale database, using a PostgresSQL connection.
We will perform the following steps:
-
Set up a new project
-
Create a Knative endpoint
|
Costs
Using Knative, we actually run user provided code. That is why it is pretty hard to create a "free tier" for a service like that. You could just mine bitcoins. So what we get is some free CPU time. Once we used that up, we will get charged. However, for a simple workshop like this, that is more than enough. And don’t forget that when you don’t use the service, it will idle and scale down to zero. |
What’s the plan?
Assuming we receive "Cloud Events", that is actually rather simple: take the data, make an SQL statement, execute. Assuming further we already know the data format, that is just a few lines of code.
However, we cannot just run a few lines of code. We need some service, some infrastructure, some storage, … or, do we?
That is where the "serverless" buzzword comes into play. We focus on the actual code of the translation. A serverless stack will take care of running this. Ideal for this case.
Going even further, we adopt "Knative" and "Knative eventing", which is based on "Cloud Events". And with that, we know how we receive our events, in which envelope format we get the event. The payload is still specific to our device.
Still, what we can do, is to tap into the Knative eventing ecosystem, and pick an existing image, which takes care of extracting information from a JSON based payload using JSONPath, and assembling an SQL statement for us. That comes in the form of an existing container image, and all that we need to do is to configure it, using environment variables.
If you are curious, you can check out the code at: https://github.com/drogue-iot/drogue-postgresql-pusher
So all that we need to do, is to configure a service to run an existing container for us. Using Knative we get scalability, scale-down to zero, monitoring, A/B deployments, and much more for free.
We’ll provide you with two options on where you can run your Knative function:
-
OpenShift developer sandbox - provides you with an quick getting started experience and a place where you can host your function up to 30 days for free
-
IBM Cloud instance - also provides you a free tier to start with, but offer you an option to automatically convert to paying option if you wish to run your function for a longer period of time.
In both cases we need to configure our function with appropriate environment variables.
| Variable name | Value | Description |
|---|---|---|
|
Some random value you define and recall later |
The bearer token a caller needs to present in order to get access to the endpoint |
|
Hostname portion from the |
The hostname of the TimescaleDB instance |
|
Port portion from the |
The port of the TimescaleDB instance |
|
|
The name of the database |
|
|
The database user which has write-access |
|
The password you in the previous section for the |
The password of the database user. |
|
|
The name of the table |
|
|
The name of the timestamp field |
|
|
The JSON path for extracting the temperature value from the actual payload |
|
|
The data type of the temperature |
|
|
The JSON path for extracting the device ID from the full event |
As we’ll see in the following section, these variables are configured differently with various providers, but the values are always the same. Now let’s dig into the hosting our function.
OpenShift
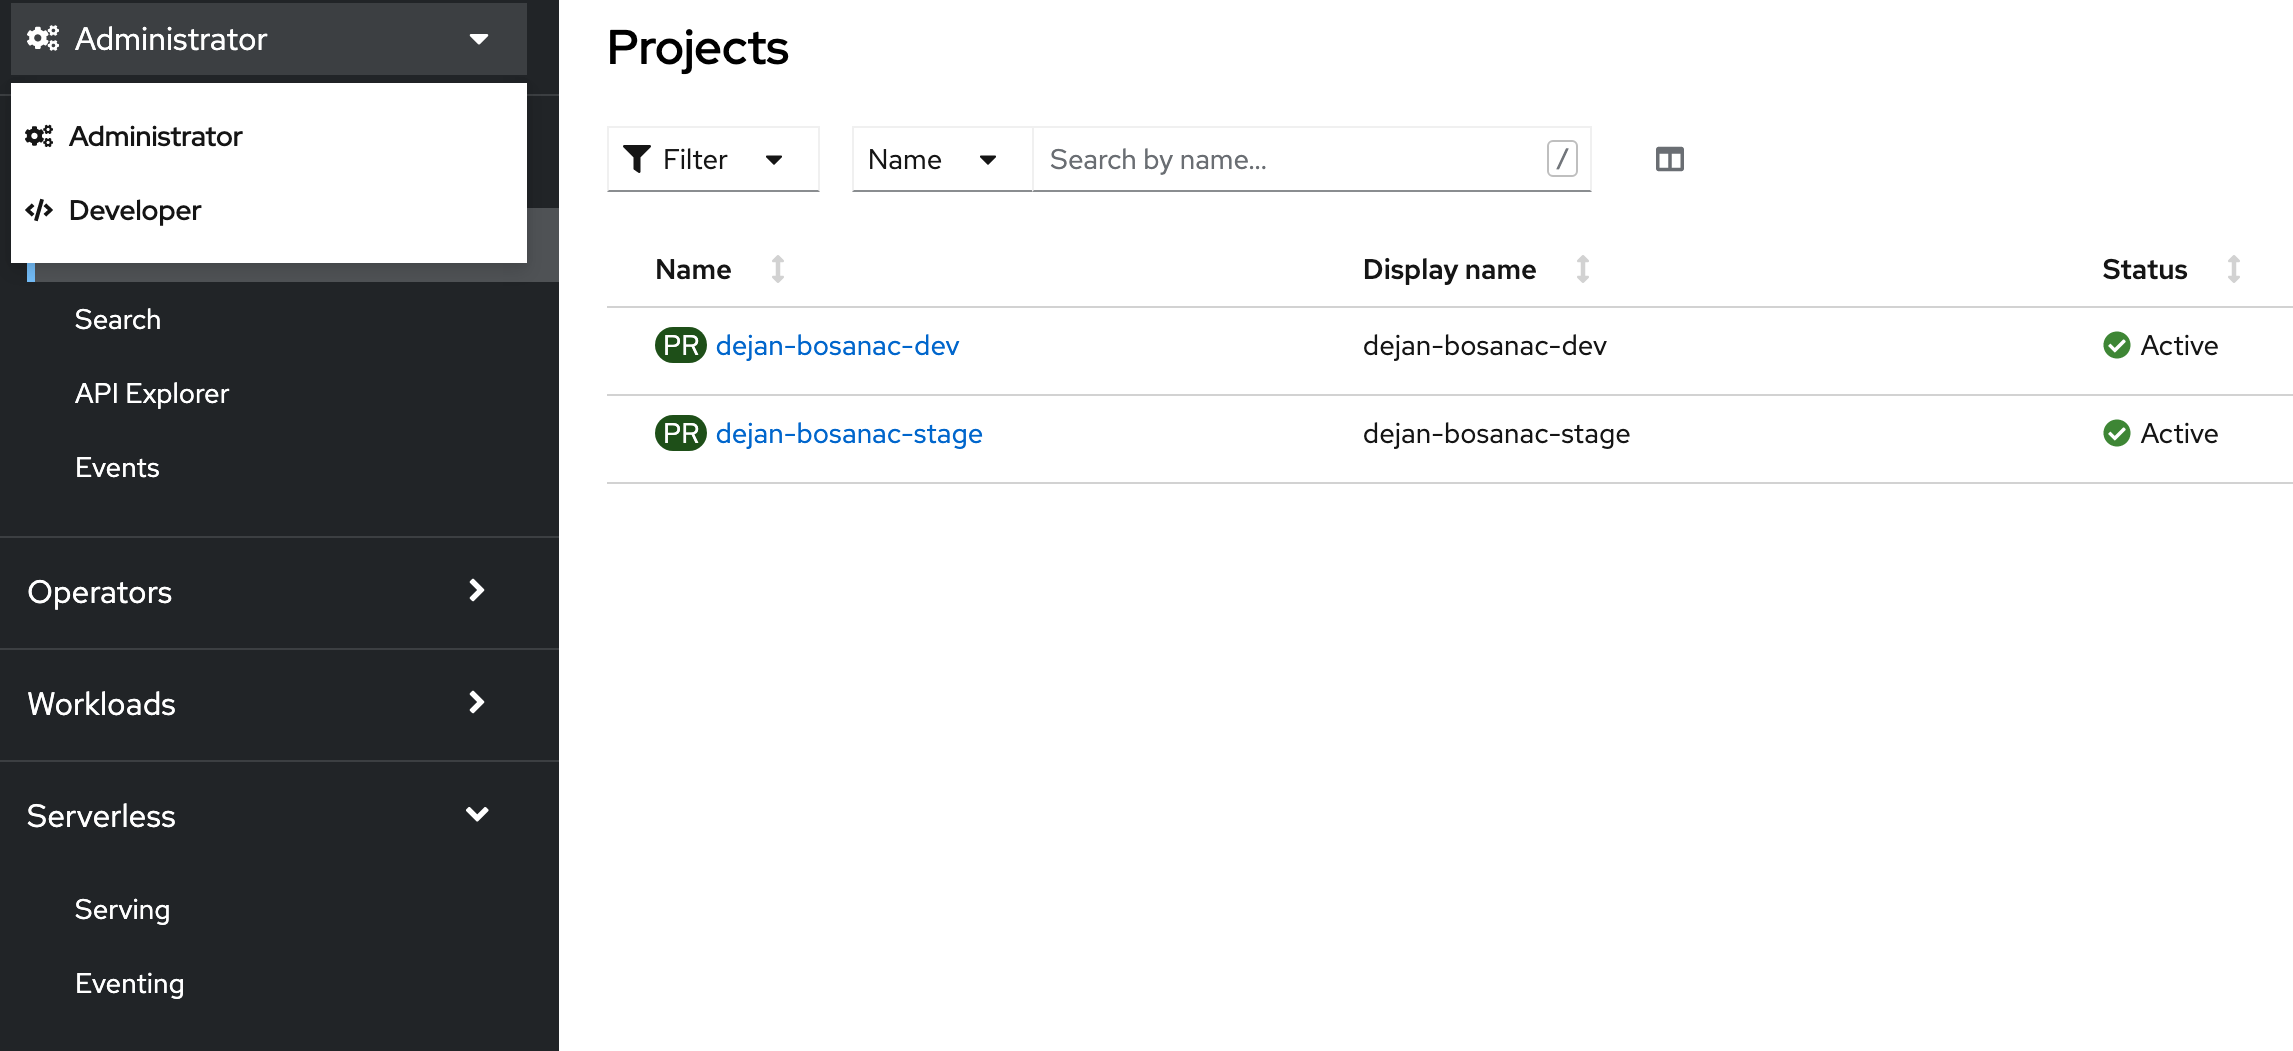
For OpenShift, log into the console, select "Administration" view and navigate to the "Serverless" section
Now select the "Serving" menu and click on the Create > Service button. Here, you can enter the YAML definition of your function, with all necessary variables properly configured, like:
apiVersion: serving.knative.dev/v1
kind: Service
metadata:
  name: sample
  namespace: dejan-bosanac-dev
spec:
  template:
    spec:
      containers:
        - image: ghcr.io/drogue-iot/postgresql-pusher:0.2.1
          env:
            - name: ENDPOINT__TOKEN
              value: "abcdef123456"
            - name: POSTGRESQL__CONNECTION__HOST
              value: "xxx.tsdb.cloud.timescale.com"
            - name: POSTGRESQL__CONNECTION__PORT
              value: "32740"
            - name: POSTGRESQL__CONNECTION__DBNAME
              value: "tsdb"
            - name: POSTGRESQL__CONNECTION__USER
              value: "pusher"
            - name: POSTGRESQL__CONNECTION__PASSWORD
              value: "pusher-password"
            - name: POSTGRESQL__TABLE
              value: "temperatures"
            - name: POSTGRESQL__TIME_COLUMN
              value: "time"
            - name: FIELD_TEMPERATURE
              value: "$.features.temperature.value"
            - name: TYPE_FIELD_TEMPERATURE
              value: "float"
            - name: TAG_DEVICE_ID
              value: "$.device"
After you create it, you’ll have your serverless function ready to use and you can copy its URL for future use.

IBM Cloud
Create a new project
If you choose to use IBM Cloud instance, log in to your and navigate to the "Code Engine" module. On the right-hand side, open the "Projects" view.
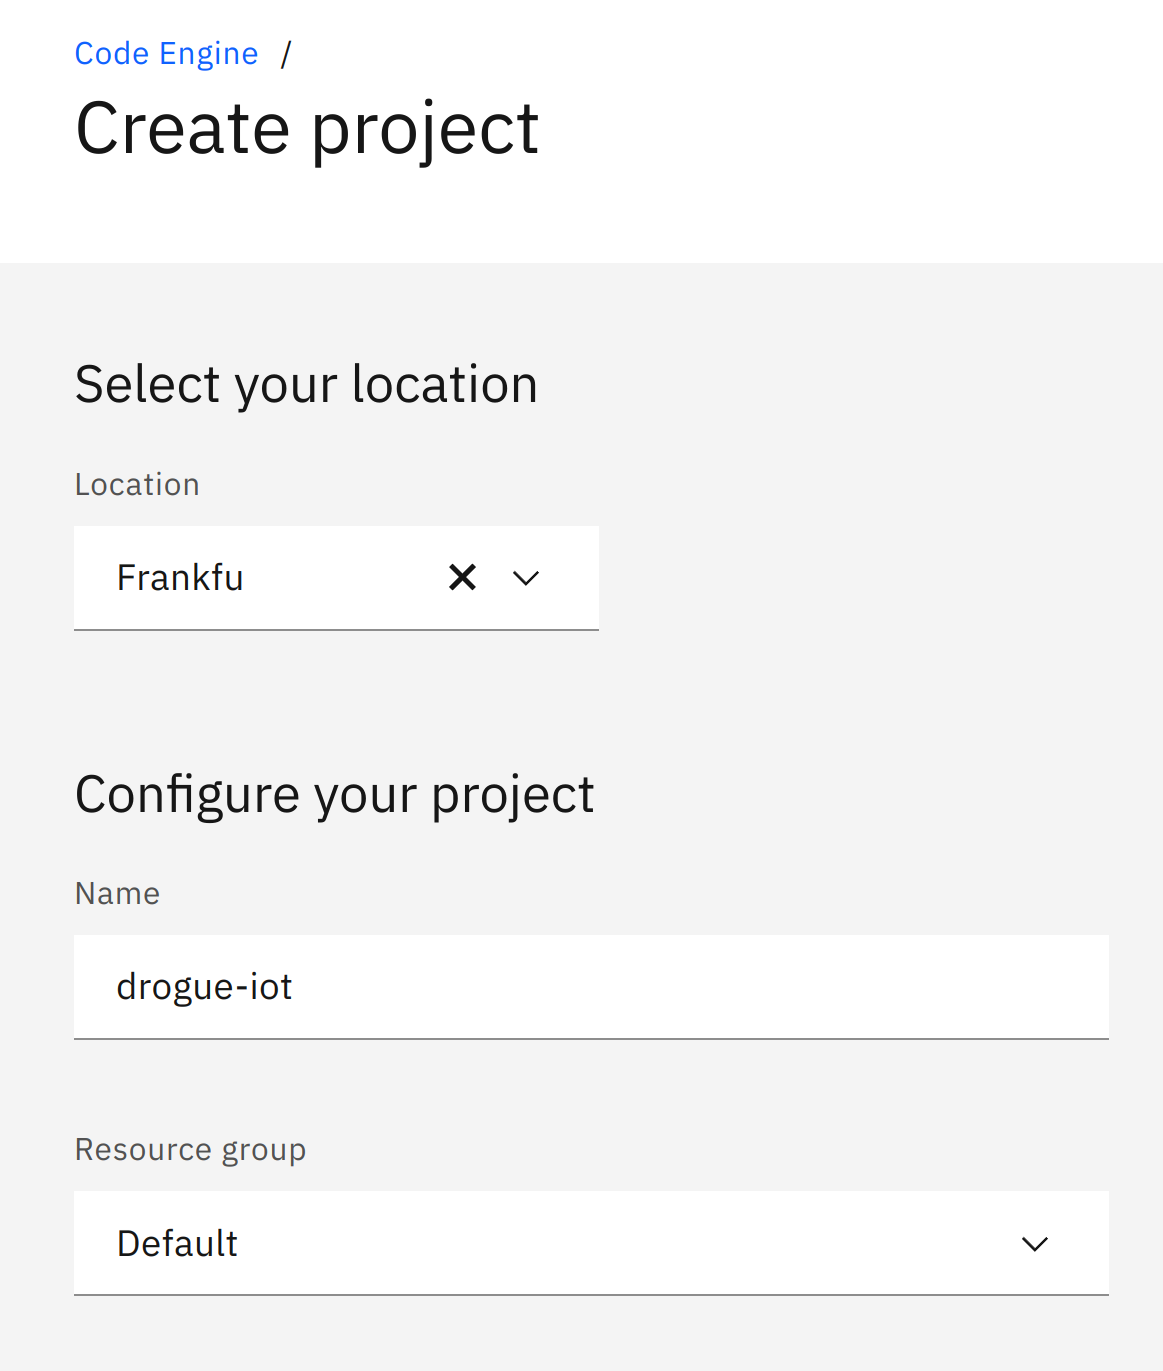
We will create a new project for this tutorial, so go ahead and press the Create button.
On the creation page, select the location, and use drogue-iot as the project name:
Project creation can take a while. Once it is ready, navigate to the project overview page and click on the Create application button:
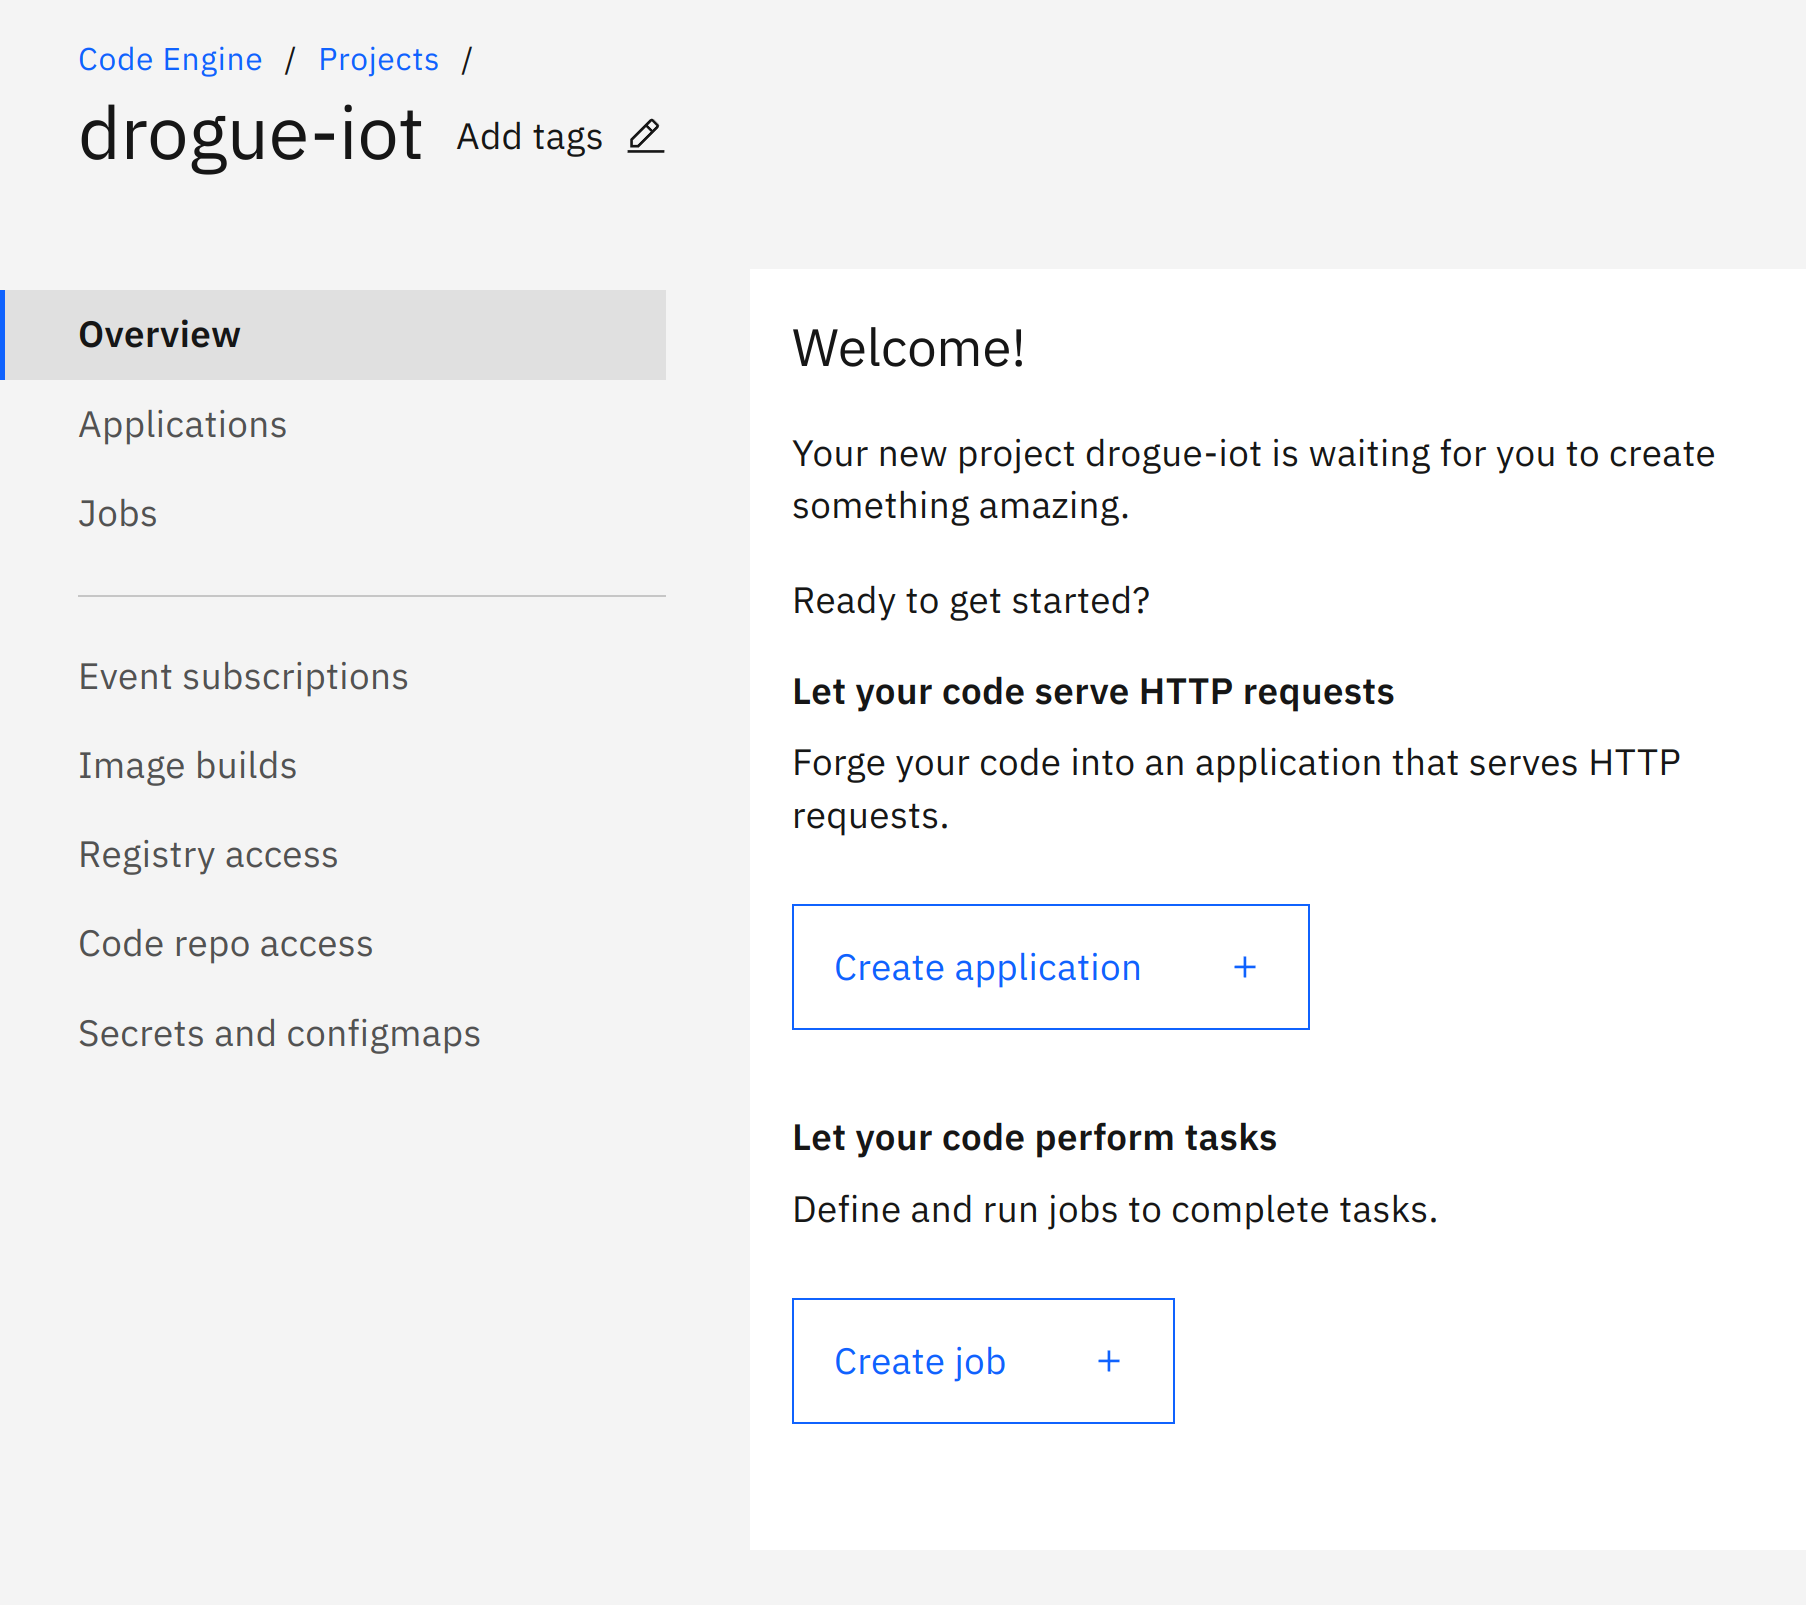
Create application
Creating a new application, we need to provide a name (use pusher) and choose "Container image" as code to run.
The image to use is ghcr.io/drogue-iot/postgresql-pusher:0.2.1.
The "listening port" is 8080 and the endpoint must be "Public".
In the "Runtime settings" section, configure the smallest instance you can find (e.g. "0.125 vCPU / 0.25 GB"). We will be running a process written in the Rust language, which is highly efficient and will not run into any limits.
An important part is the section "Environment variables", as it will contain our configuration. Here we need to add function configuration by clicking on the Add button, using a "Literal value" entry.
This should look something like this:
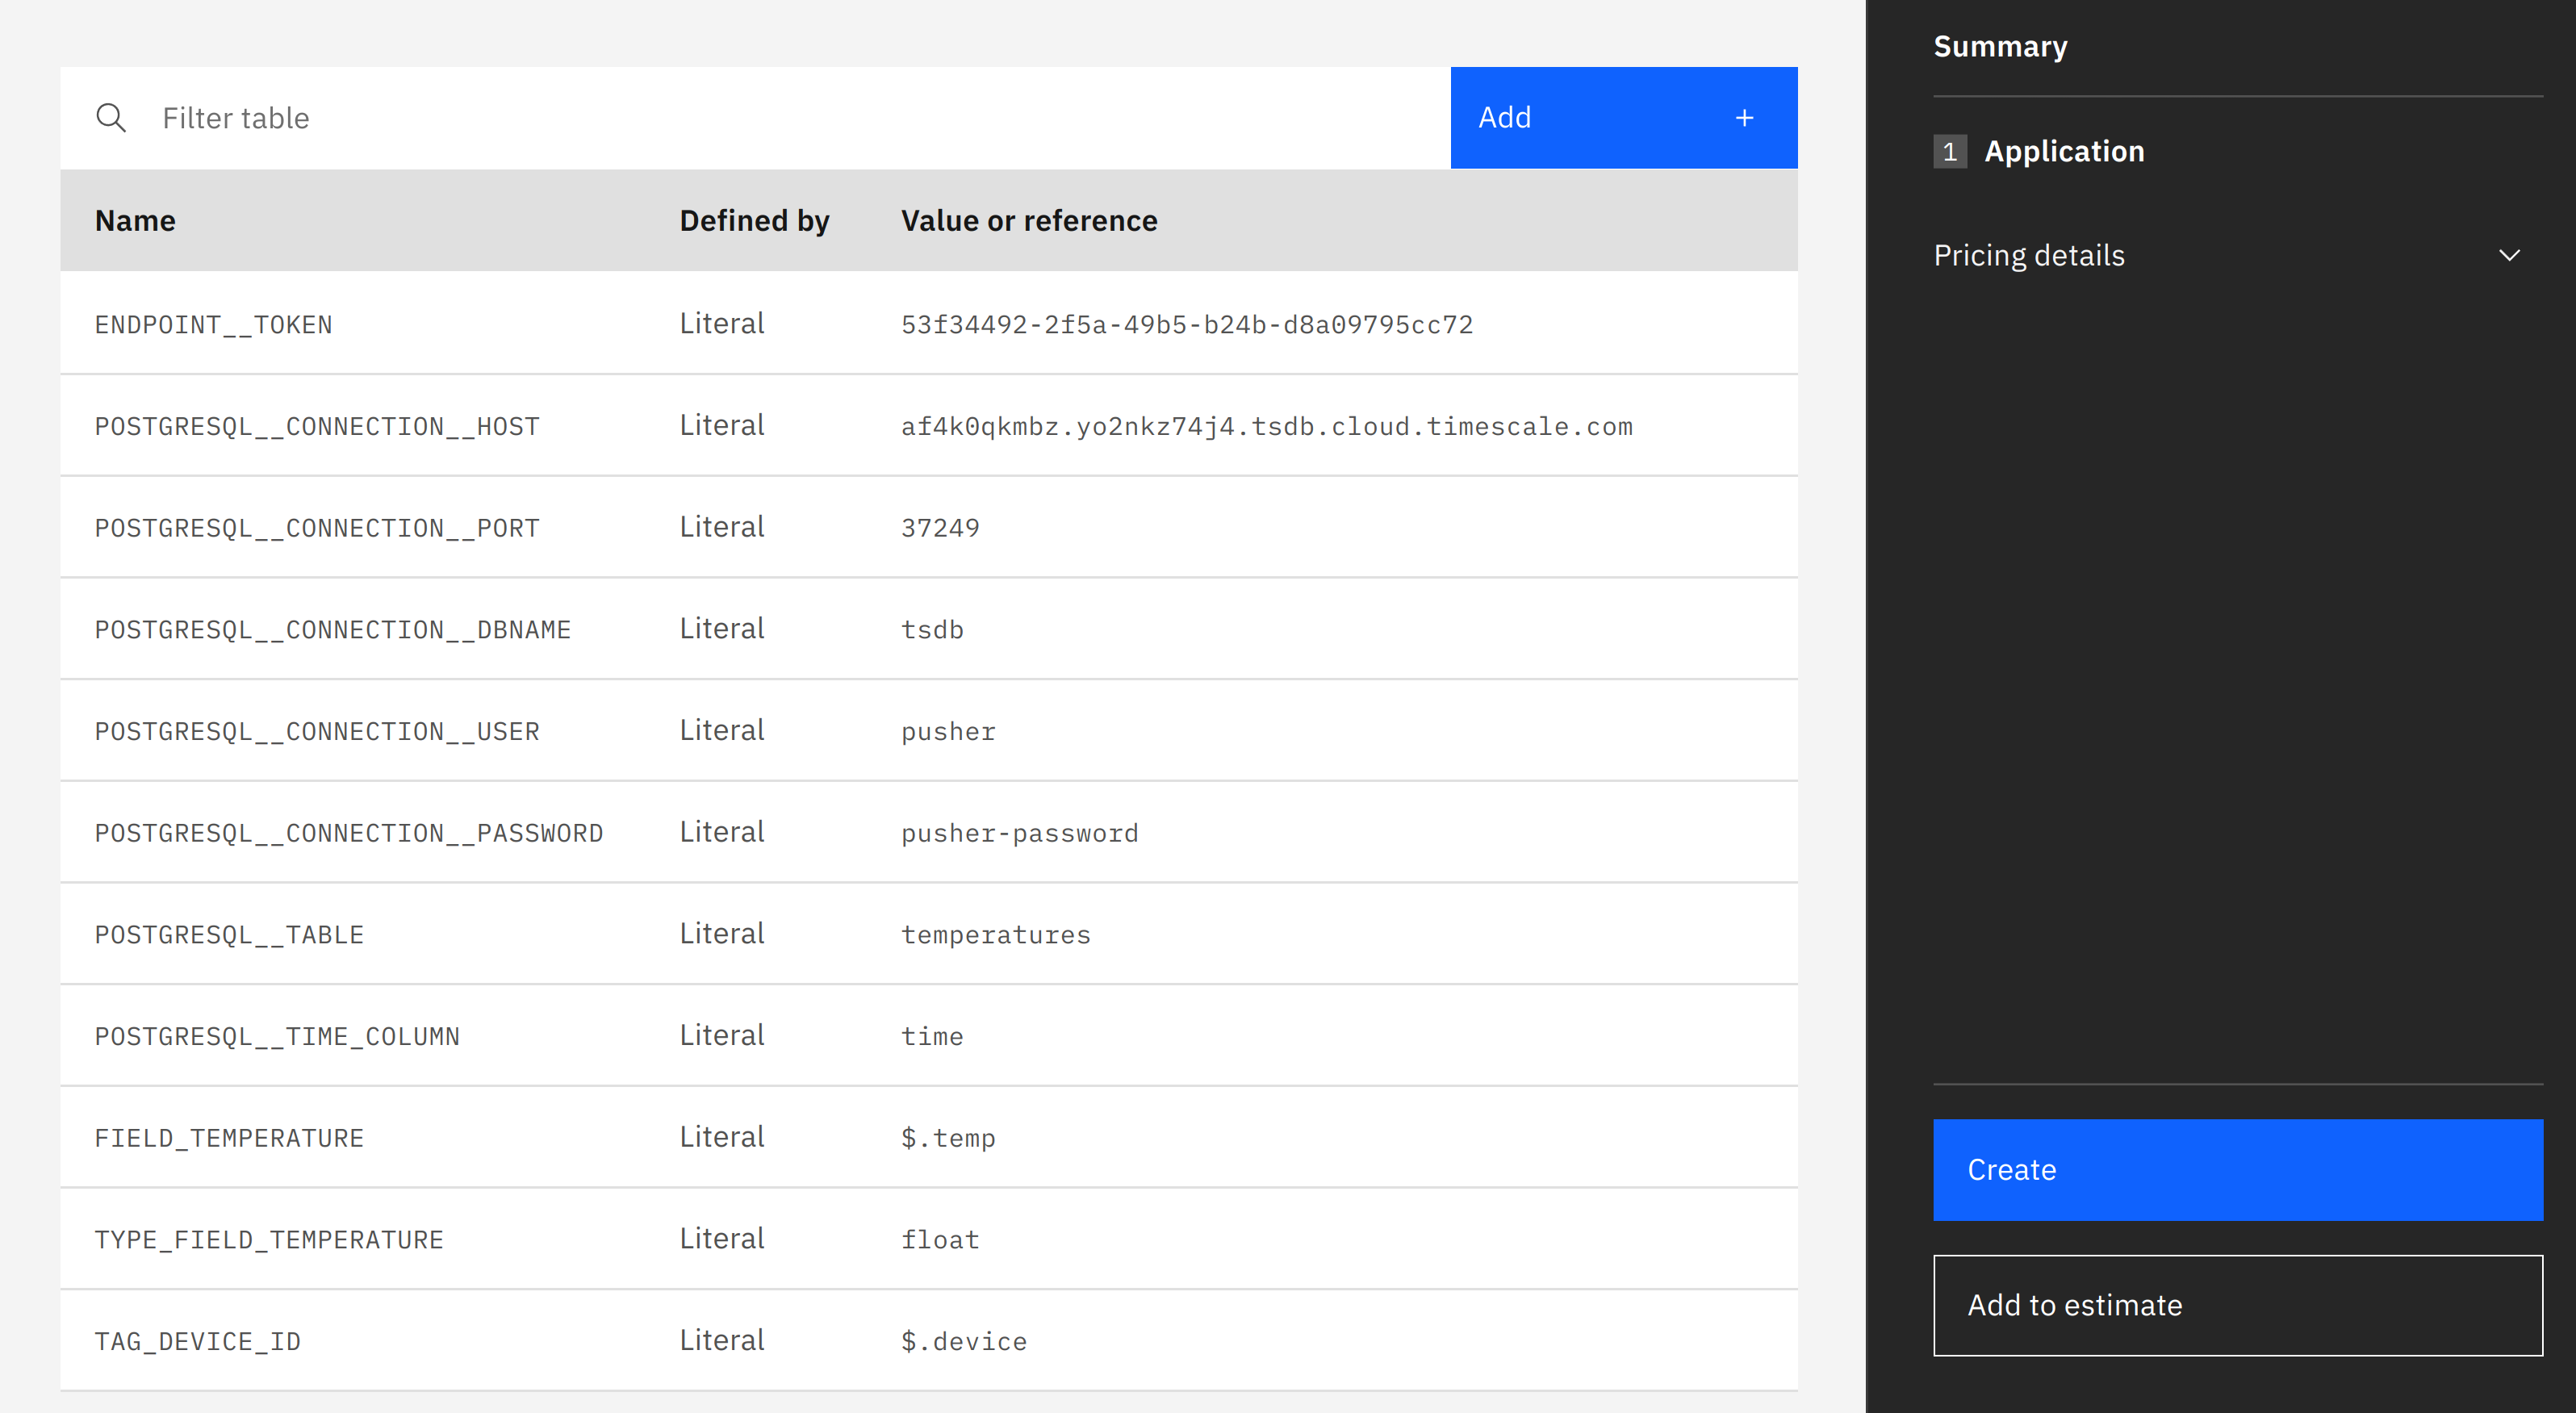
Finally, click on the Create button on the right-hand side, which will start the deployment process of the application.
Once it is deployed correctly, the overview should look like this:
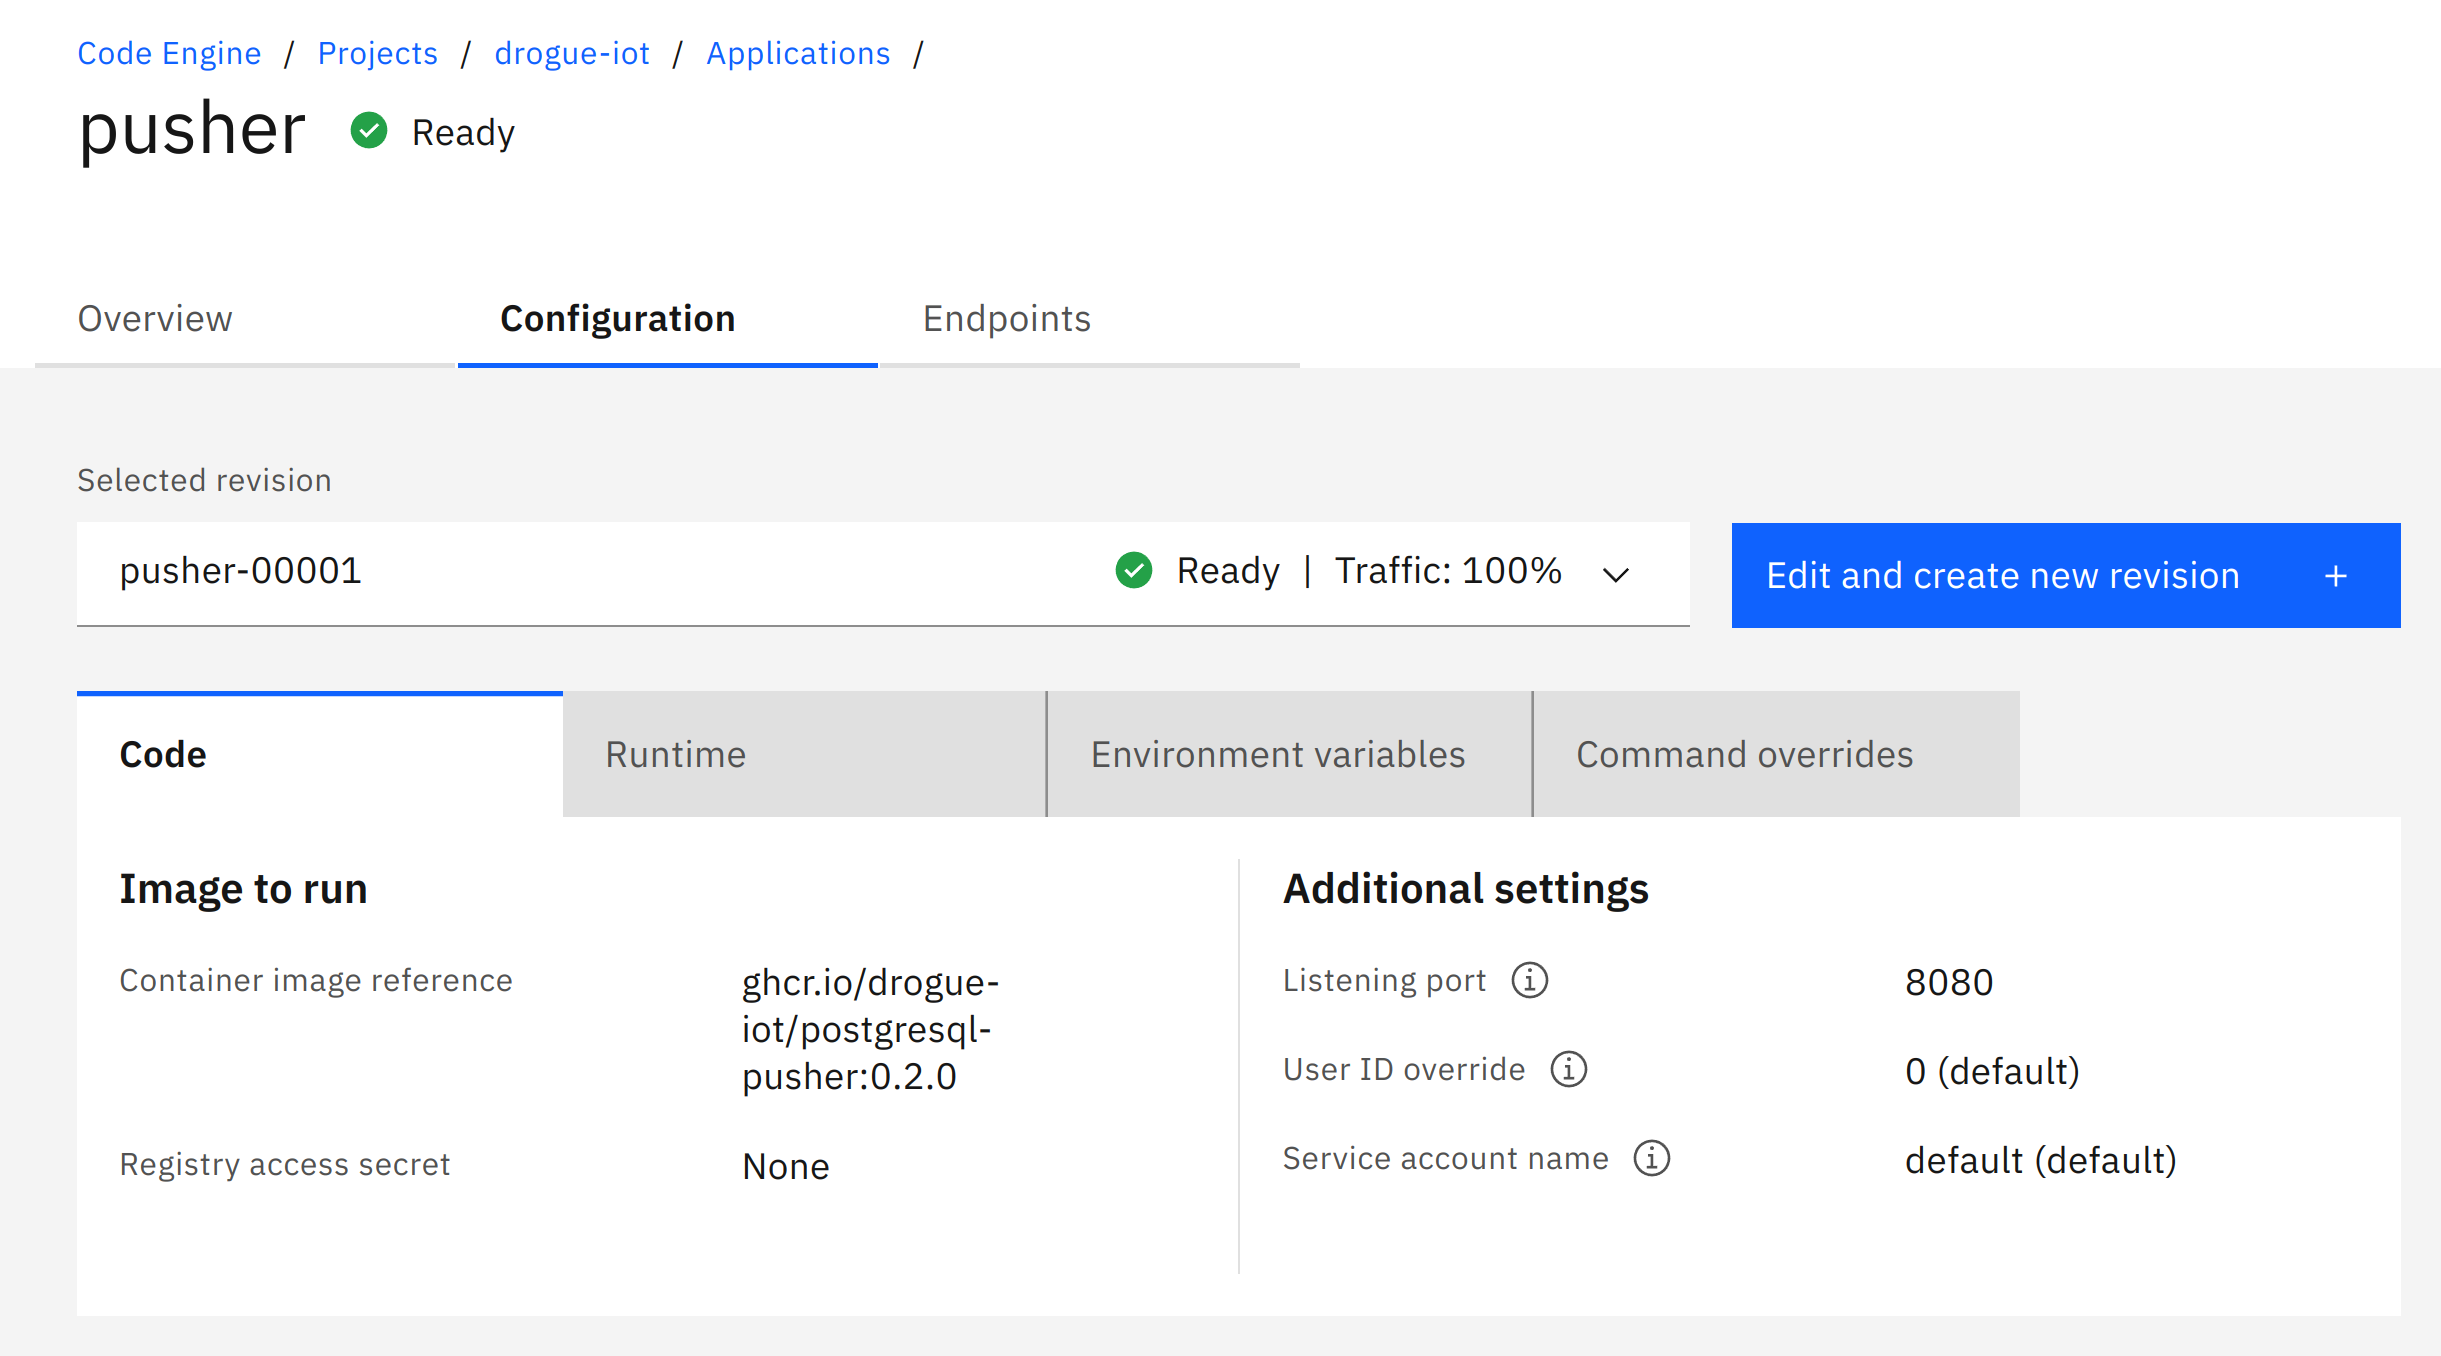
Take a look at the "Endpoints" tab, and note down the "Public URL", which we will need later on.
What’s next?
We’ve set up the service which translates the device payload into SQL statements for TimescaleDB. However, currently no one is sending data to this endpoint. And as long as that is the case, the service will be scaled down to zero and not consume any resources, or cost any money.
So, it is time to send some data to this endpoint.