Timescale
As all paths lead to Timescale, this is the first component we will set up. This will include the following steps:
-
Create a new instance
-
Create a table
-
Create two users for accessing the database
|
Costs
An instance will cost a certain amount of money per hour. The amount depends on the resources you consume. The "bigger" your database is planned to be, the more it will cost. However, you can test some tiers of Timescale free for 30 days. That is all that we need, and you can shut it down at ant time. And in the end, if the data is important to you, why not spend a few bucks on someone to take care of it. |
Create instance
Navigate your browser to the Timescale Cloud, and create a new instance.
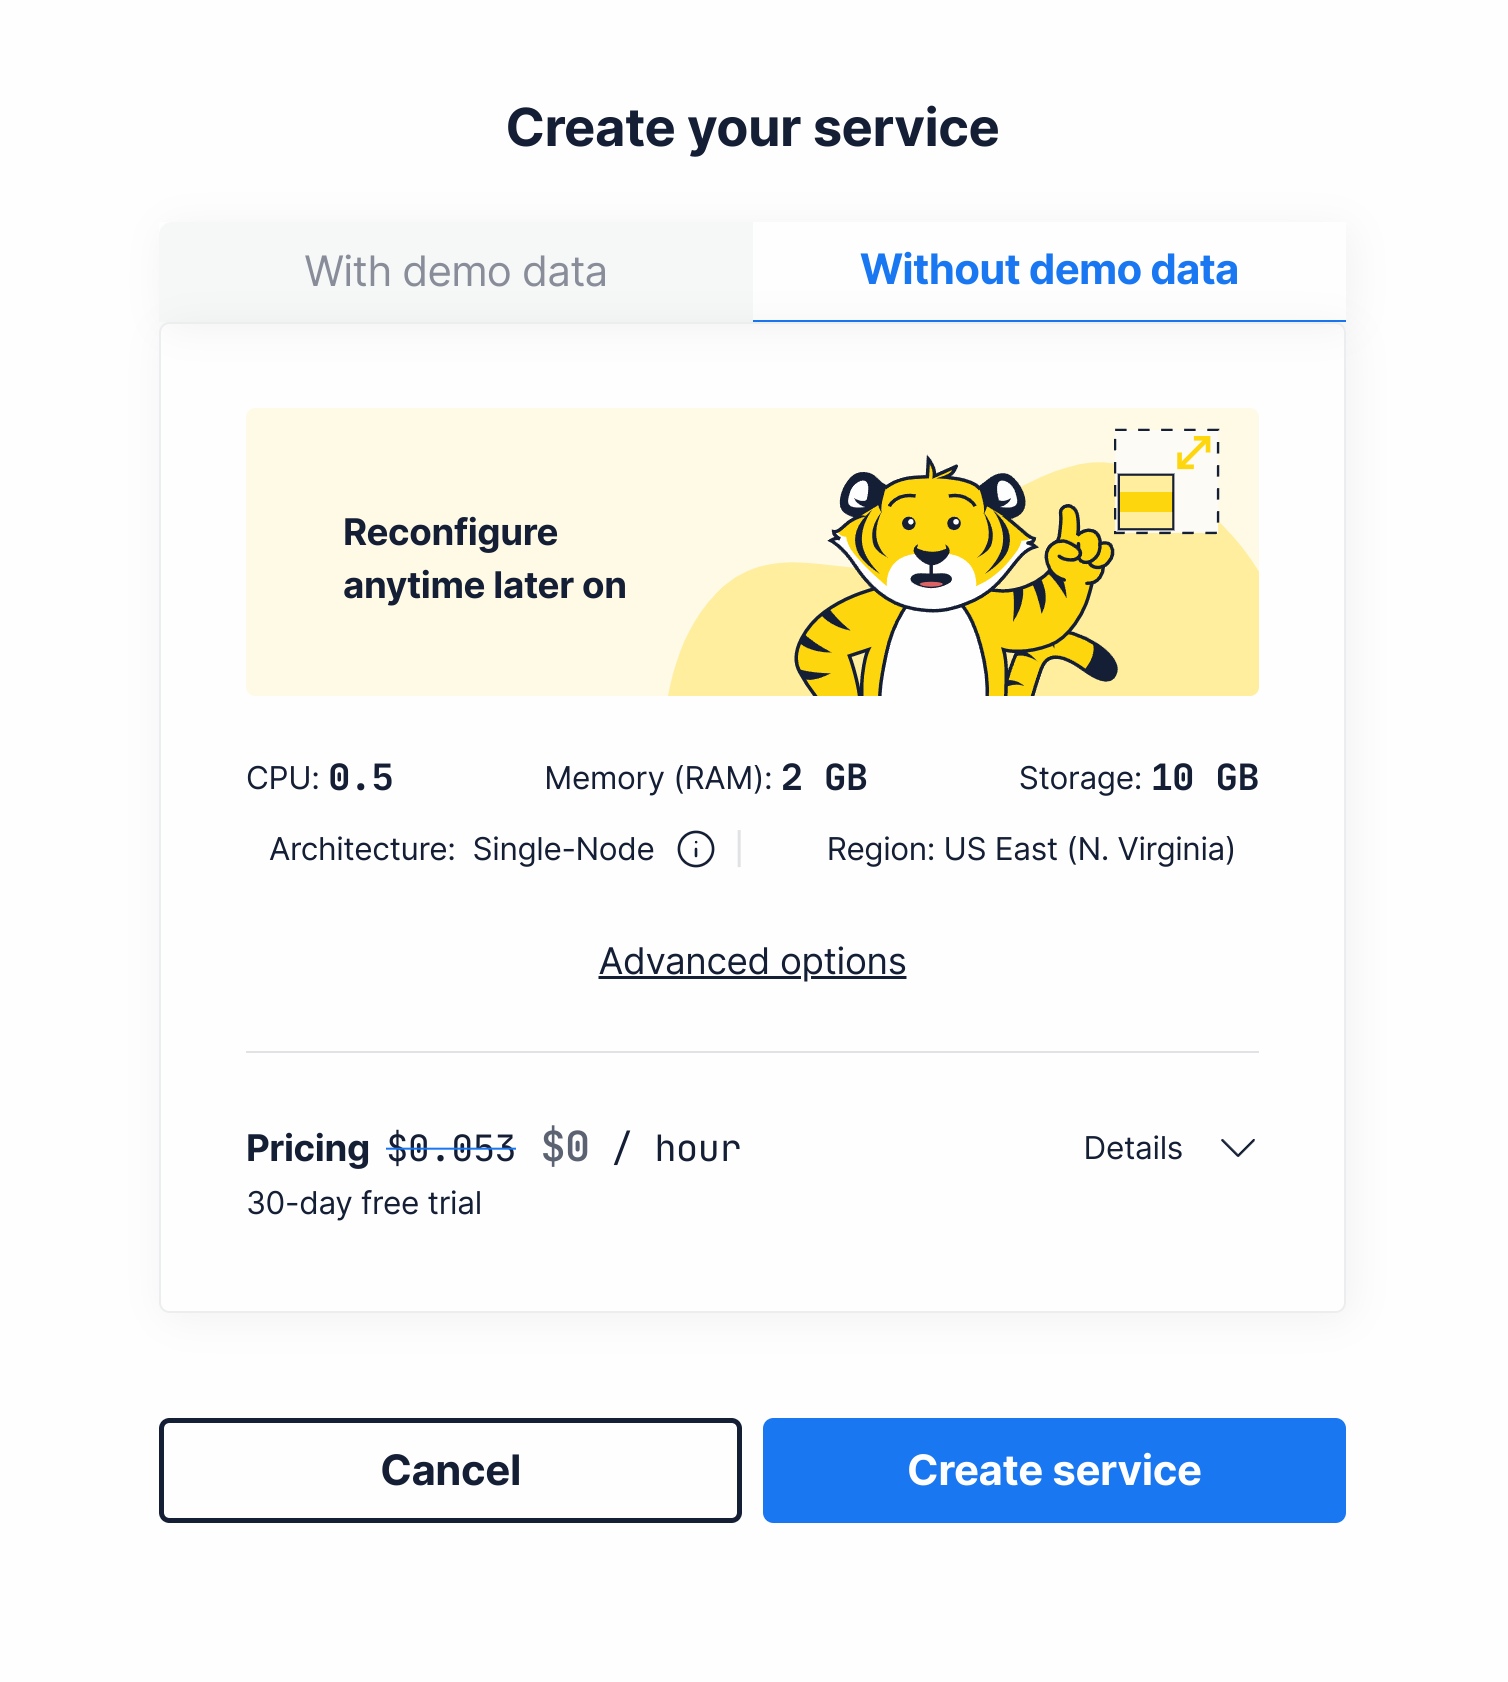
The default settings will work just fine. Of course, you can tweak settings like "Region" to suit your needs. Just be sure that you do not add "demo data", as we don’t want to get this in our way.
While the provisioning process is running, pay attention to the credentials section of the page:
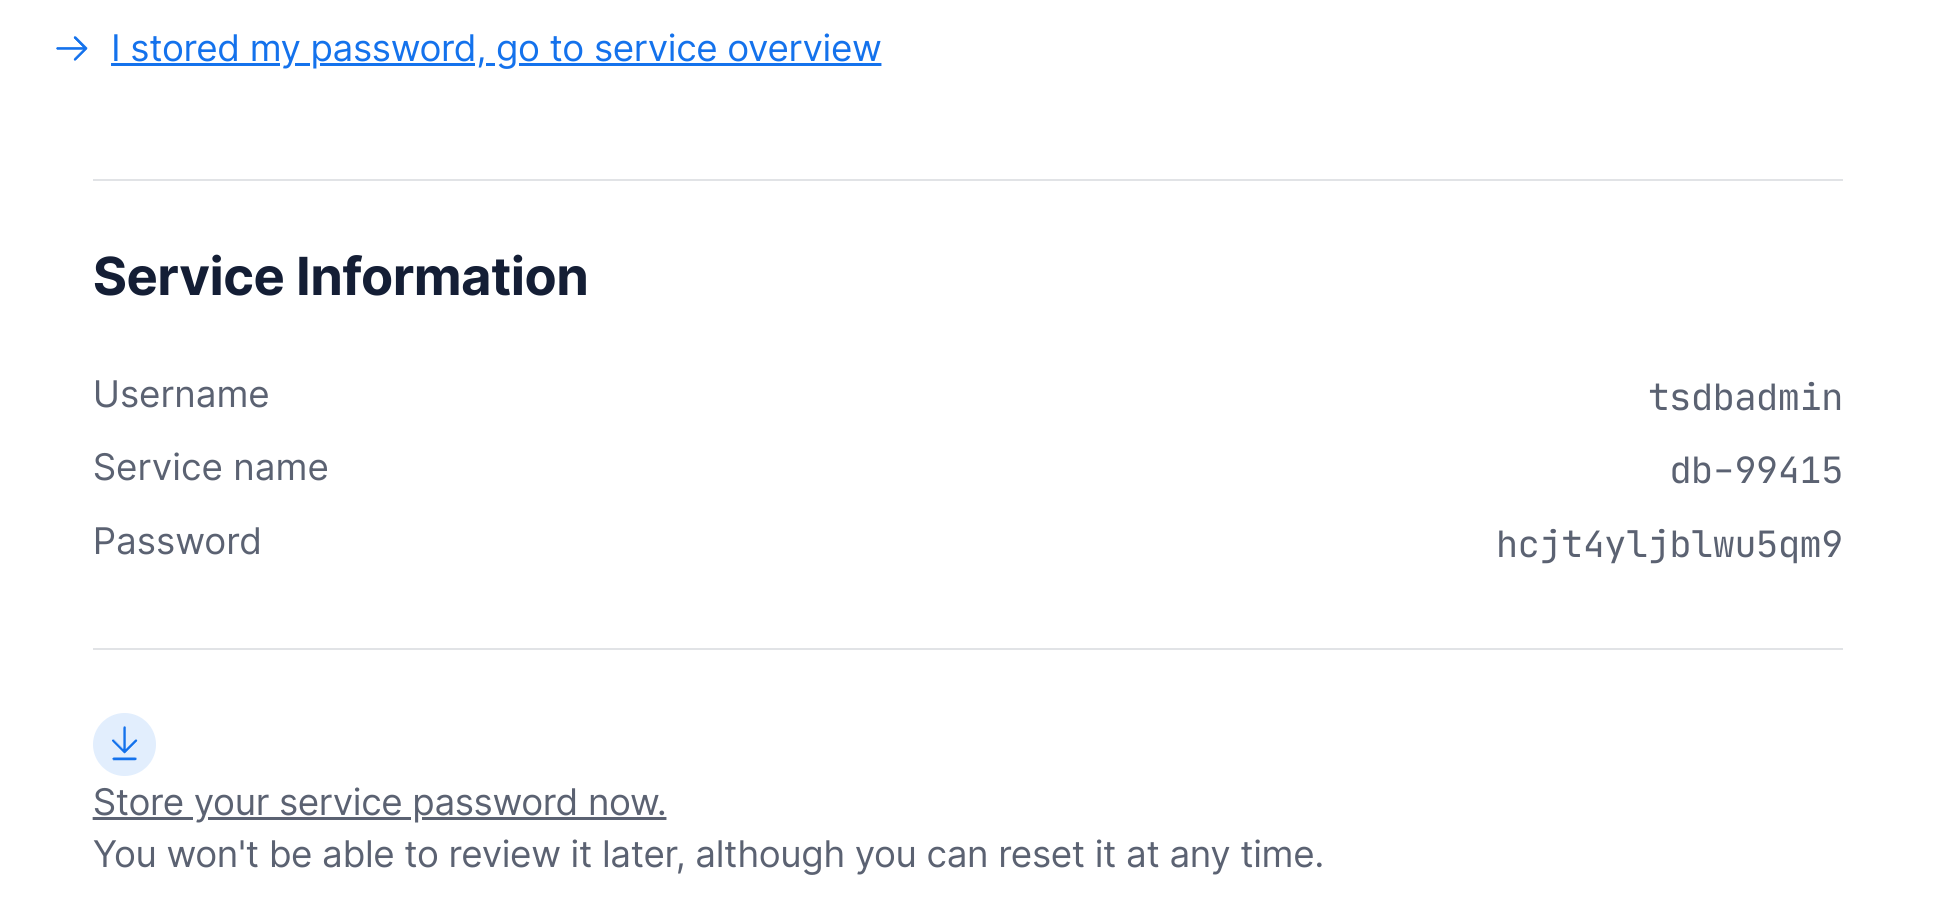
It does contain the admin password for your instance. You will once see this once. Once you closed this page, you can reset the password, but not recover it.
Connecting
In order to connect, we will need to connect to the database using a PostgreSQL client. Simple get psql for your
favorite operating system. Clicking on the "How to connect" button will open a dialog that will help you out with
all the details.
If you use Fedora, you can simply install the PostgreSQL client by running:
sudo dnf install postgresqlWhen you have psql installed, just copy the command and get connected:
$ psql "postgres://tsdbadmin@af4k0qkmbz.yo2nkz74j4.tsdb.cloud.timescale.com:37249/tsdb?sslmode=require"
Password for user tsdbadmin: (1)
psql (13.4, server 13.6 (Ubuntu 13.6-1.pgdg21.04+1))
SSL connection (protocol: TLSv1.3, cipher: TLS_AES_256_GCM_SHA384, bits: 256, compression: off)
Type "help" for help.

tsdb=> (2)| 1 | Enter your password here |
| 2 | Have fun with SQL |
You are connected to your database. Currently, it is empty, so follow along the next steps to add some content.
Configure instance
First, we will create a new table, which will hold our temperature data per device. So we need: a device ID, a timestamp, and the actual value. All information is required. In SQL, that looks like this:
CREATE TABLE temperatures
(
    time            TIMESTAMP WITH TIME ZONE NOT NULL,

    device_id       VARCHAR(64)              NOT NULL,

    temperature     DOUBLE PRECISION         NOT NULL
);
Go ahead and execute this using psql. You can just copy & paste it, or create a .sql file and run it instead.
Using CREATE TABLE we created a simple PostgreSQL table. Nothing fancy, yet. As a next step, we will convert this
table into a "hypertable", which is a table optimized for time-series data. This is where the power of Timescale on
top of PostgreSQL comes into play. Execute the following statement:
SELECT create_hypertable('temperatures', 'time');Pretty simple. There is a lot more to it, you can learn more about hypertables from the TimescaleDB documentation.
Of course, we don’t want to use the "admin" user with the different services which need access to the database. So we will create two users: one for writing data, one for reading data. Just as you would do with a normal database:
CREATE USER pusher WITH PASSWORD 'pusher-password';
GRANT INSERT ON ALL TABLES IN SCHEMA public TO pusher;

CREATE USER dashboard WITH PASSWORD 'dashboard-password';
GRANT SELECT ON ALL TABLES IN SCHEMA public TO dashboard;| Choose reasonably secure passwords. Just ensure that you recall them later on. |